Data Configuration
Configure where ZettaQuant reads your data from and where analysis results are stored directly inside Snowflake.
This page connects your Snowflake tables to the ZettaQuant SEAL analysis pipeline.
How It Works
Configure your data in three steps:
- Select your database and schema
- Configure data source and result tables
- Save and start processing
Once saved, processing runs automatically.
Step 1 - Database & Schema

Select the Snowflake workspace that contains your data.
Example
- Database:
DEMO_DB - Schema:
EC_SAMPLE_2021
Step 2 - Data Source & Table Mapping
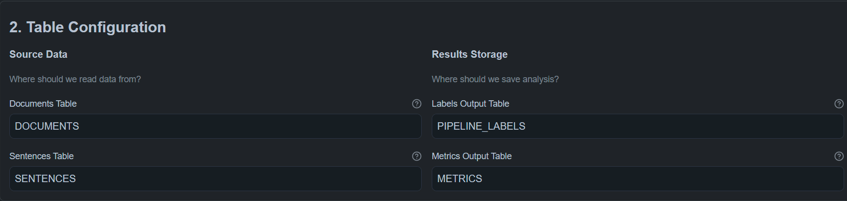
Define where documents are read from and where results are stored.
Input Tables (Source Data)
Use existing structured Snowflake tables.
Required Columns
| Table | Required Fields |
|---|---|
| Documents | document_id |
| Sentences | document_id, sentence_id, sentence_text |
Output Tables (Results)
| Purpose | Table Name |
|---|---|
| Labels | PIPELINE_LABELS |
| Metrics | METRICS |
If output tables do not exist, ZettaQuant creates them automatically.
Requirements
- Read access to source tables
- Proper grants configured
- See Data Access Grants
Step 3 - Model Registry (Optional)

Optional location for saving trained models.
| Field | Example |
|---|---|
| Database | MODELS |
| Schema | REGISTRY |
Leave empty to skip model persistence.
Next Steps
After configuration:
- Use PDF Ingestion if you want to upload new documents
- Use ZQ Classify to run analysis on configured data